
Maintaining a Sump Pump Before You Actually Need It
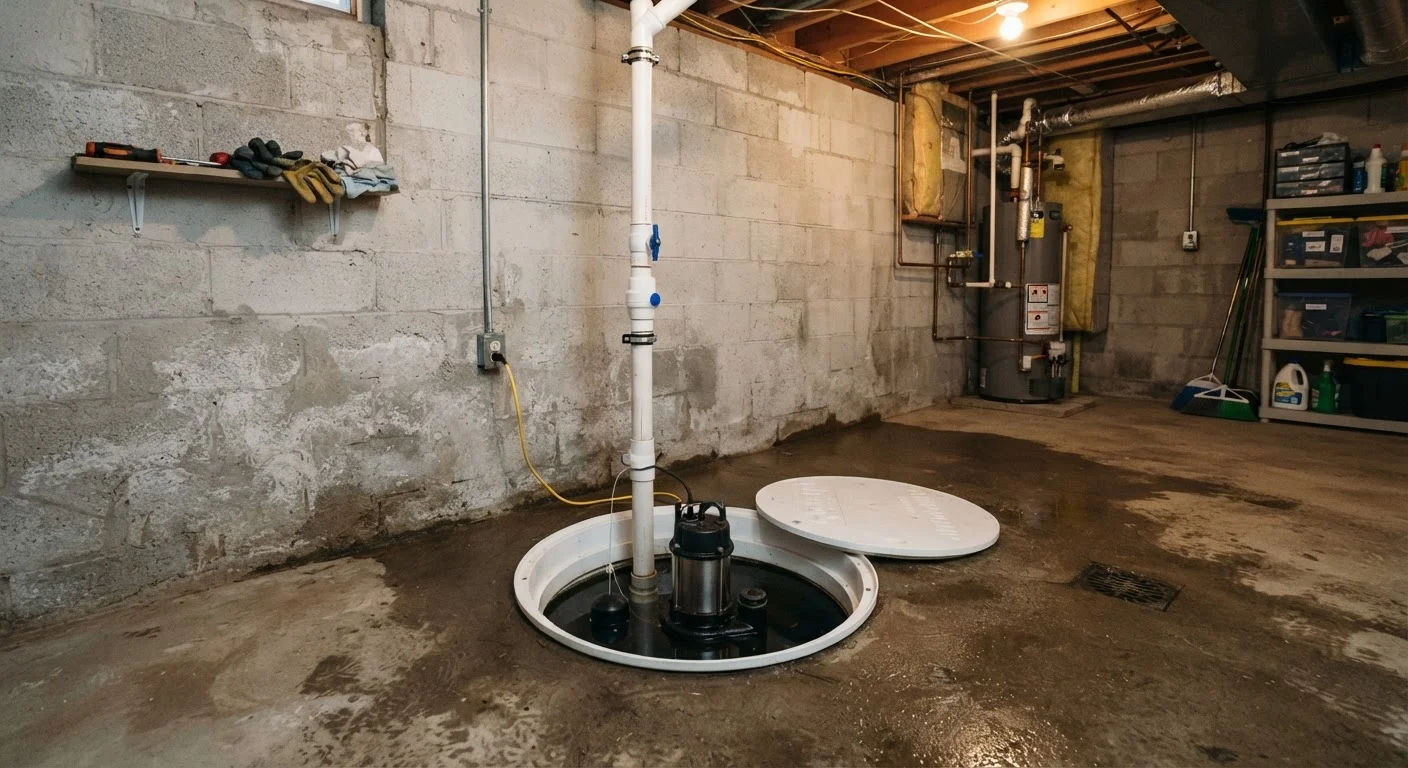
Photo credit: ExplorerGrid.com | Endless Grid Of Factual Content
In this article
A sump pump that fails during a storm can flood your basement in hours. Learn the inspection and testing routine that keeps it reliable.
Key Takeaways
- Test your sump pump at least twice a year — before spring rains and before fall storms.
- A float switch stuck in the down position is one of the most common causes of pump failure.
- Every sump pump system needs a functioning check valve to prevent water from flowing back into the pit.
- Backup power sources are essential — most basement floods happen during storms that knock out electricity.
- Sediment and debris buildup in the pit can burn out the pump motor over time if not cleaned regularly.
Why Routine Inspection Matters More Than You Think
A sump pump is one of those systems homeowners rarely think about until it fails — and failure almost always happens at the worst possible moment. Heavy rainfall, snowmelt, and rapid ground saturation can send water rising into an unprotected basement within hours. Because sump pumps sit idle for long stretches between rain events, components can degrade invisibly: float switches stick, motors seize from inactivity, and discharge pipes develop cracks from freeze-thaw cycling.
The good news is that preventive maintenance is straightforward and well within reach for most homeowners. Unlike systems that require licensed trades, sump pump upkeep primarily involves cleaning, visual inspection, and a functional test — no specialized skills required. Scheduling this twice a year, ideally before spring storm season and again before winter, gives you enough lead time to address any problems without pressure.
Never Wait for a Storm to Test It
A sump pump that has sat idle for months may fail silently — the motor can seize, the float can stick, or the discharge line can clog without any obvious warning signs. Testing before heavy rain season is the single most important thing you can do to protect your basement. If you discover a problem during a test, you have time to repair or replace the pump before an emergency.
Before you start, gather your tools and confirm your pump is plugged into a GFCI-protected outlet. This is a code requirement in most jurisdictions and a meaningful safety layer in a wet environment.
What you will need
Step-by-Step Maintenance Routine
Work through each step in order. The entire process typically takes under 45 minutes for a standard submersible pump setup.
Wet/Dry Vacuum
Removes sediment, gravel, and standing water from the sump pit during cleaning.
Bucket (5-gallon)
Used to pour water into the pit to trigger the float switch during functional testing.
Flashlight or Headlamp
Illuminates the pit interior so you can clearly inspect the float, inlet screen, and walls.
Adjustable Wrench
Tightens fittings on the discharge pipe and check valve if they have loosened over time.
Battery Backup or Water-Powered Backup Pump
Provides a secondary pump that activates when the primary pump fails or loses power.
Unplug the pump and inspect the pit
Unplug the pump from the wall outlet before doing anything else. Use a flashlight to look into the pit and note any debris, gravel, sand, or visible rust. Check the walls of the pit liner for cracks. A small amount of sediment at the bottom is normal, but larger debris — broken pieces of liner, rocks, or hardened mud — can jam the impeller.
Clean the pit and pump screen
Use a wet/dry vacuum to remove sediment and standing water from the pit floor. Lift the pump carefully and rinse the intake screen or inlet guard under running water to clear any debris blocking the opening. A clogged inlet screen forces the motor to work harder and can shorten its lifespan significantly.
Inspect and test the float switch
The float switch tells the pump to turn on when water reaches a set level. Manually lift the float to make sure it moves freely and snaps back without sticking. A float that is wrapped in debris or jammed against the pit wall will prevent the pump from activating at all. Some pumps use a vertical float on a rod — verify the rod slides freely along its track.
Check the discharge pipe and check valve
Trace the discharge pipe from the pump to where it exits the home. Look for cracks, loose fittings, or disconnected joints. The check valve — a one-way valve typically located on the vertical section of discharge pipe — prevents water from draining back into the pit after the pump shuts off. Listen for a gentle click when you manually push the valve flap; if it does not move or seal, replace it. Backflow wastes pump cycles and can lead to premature motor burnout.
Also confirm that the outdoor discharge point empties at least 10 feet from your foundation and drains away from the house. If it empties too close, water simply re-enters the soil around your basement — an issue worth understanding alongside broader waterproofing concerns. See common basement waterproofing misconceptions before making any assumptions about what your system can handle.
Run a pour test to confirm operation
Plug the pump back in. Fill a 5-gallon bucket with water and pour it slowly into the pit, directly around the float switch. The pump should activate within seconds once the water level rises enough to lift the float. Watch the water level drop, then confirm the pump shuts off automatically once the pit is nearly empty. If it runs continuously or does not shut off, the float switch needs adjustment or replacement.
Verify your backup power solution
Most basement floods occur during severe storms — exactly when the power is most likely to go out. If you have a battery backup pump, test it by unplugging the primary pump and repeating the pour test using the backup unit alone. Replace backup batteries according to the manufacturer's schedule, typically every two to three years. If you do not yet have a backup system, consider what level of flood risk your home carries before deciding whether one is warranted.
Just as skipping routine vehicle maintenance compounds into costly repairs — as explored in the hidden costs of deferred maintenance — letting sump pump upkeep lapse can turn a minor investment into a major restoration bill.
Mark Your Inspection Dates on a Calendar
Treat sump pump maintenance the same way you would a smoke detector test — schedule it for a recurring date, such as the first weekend of March and the first weekend of October. Pairing it with another seasonal task, like fall home prep, makes it easier to remember and ensures nothing slips through the cracks.
Disconnect Power Before Any Hands-On Work
Always unplug the sump pump from its outlet before reaching into the pit, cleaning the impeller, or inspecting any internal components. Water and electricity in close proximity create a serious shock hazard. Do not rely on a switched outlet — physically remove the plug from the wall.
When to Call a Professional
Most sump pump maintenance tasks are genuinely DIY-friendly, but some situations call for a licensed plumber or waterproofing contractor. If you notice water entering the pit faster than the pump can discharge it, this may signal inadequate pump capacity, a failed drain tile system, or hydrostatic pressure that exceeds what a standard residential pump is designed to handle. A pump that runs nearly continuously during dry weather — when there has been no recent rain — can indicate a cracked foundation or a failed footer drain that needs professional assessment.
Motor replacement, discharge pipe rerouting through finished walls, and any work involving the foundation itself should be evaluated by a qualified professional. When comparing quotes, ask specifically whether the work will require permits and inspections under your local building code — requirements vary considerably by municipality. Keeping your sump pump in good shape is one piece of a larger home maintenance picture; a well-maintained home overall tends to avoid the compounding repair costs that follow deferred upkeep.

Author
Home & Garden Editorial Team
Home & Garden Editorial Team is the collective byline for our editorial team and contributor network. Articles published under this byline or an editorial pen name are researched, written, and reviewed according to our editorial standards for clarity, consistency, and independence before publication.
View all articles →