
What Homeowners Get Wrong About HVAC Filter Changes
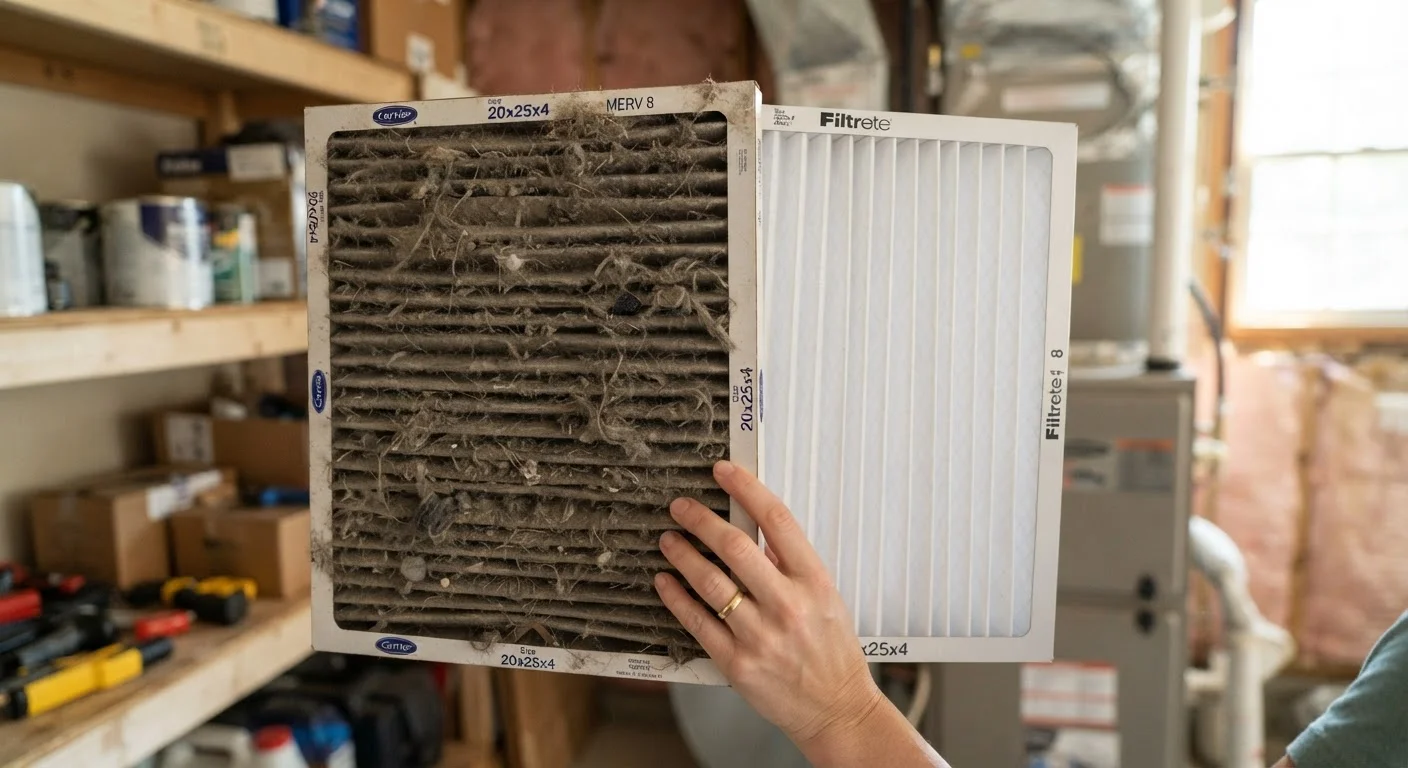
Photo credit: ExplorerGrid.com | Endless Grid Of Factual Content
In this article
Changing your HVAC filter sounds simple, but the wrong interval or filter type can reduce efficiency and strain your system. Here's the full picture.
Key Takeaways
- Changing filters too infrequently is the most common HVAC mistake, straining motors and reducing air quality.
- Higher MERV-rated filters are not always better — they can restrict airflow in systems not designed for them.
- Filter size must match your system exactly; even small gaps let unfiltered air bypass the filter entirely.
- Pet owners, allergy sufferers, and households with smokers need more frequent filter changes than average.
- Skipping filter changes can void HVAC manufacturer warranties and shorten equipment lifespan significantly.
Why Filter Changes Matter More Than Most Homeowners Realize
The HVAC filter is one of the least glamorous components in a home — and one of the most consequential. It sits quietly in a slot near the air handler or return vent, trapping airborne particles before they reach the blower motor, heat exchanger, and evaporator coil. When it's neglected, those particles accumulate inside the system itself, reducing efficiency and creating conditions for costly mechanical failure.
The core problem isn't that homeowners don't know filters need changing — most do. The problem is misunderstanding how often, which type, and how correctly to do it. These three gaps are where the real damage happens. For a broader picture of how air movement affects your home's health and energy use, see how home ventilation actually works.
Changing the filter on a fixed calendar schedule regardless of actual conditions.
Why it happens: Manufacturers print general guidelines — often 30, 60, or 90 days — and homeowners treat these as firm rules rather than starting points based on average household use.
Choosing a high-MERV filter without confirming the system can handle the added airflow resistance.
Why it happens: Higher MERV ratings are marketed as better air quality, and many homeowners assume upgrading the filter is always a straightforward improvement.
Installing a filter that's the wrong size, leaving gaps around the edges.
Why it happens: Filter sizing can be confusing — nominal dimensions printed on the frame don't always match exact measurements, and packages look similar on store shelves.
Installing the filter facing the wrong direction, reversing the intended airflow.
Why it happens: The arrow indicating airflow direction is small and easy to miss, especially in poorly lit utility closets or cramped mechanical rooms.
Skipping filter changes entirely during mild-weather months when the system runs infrequently.
Why it happens: Homeowners associate filter changes with active heating or cooling seasons and forget that even low system usage allows dust to accumulate on a stationary filter.
Getting Filter Changes Right: Practical Guidance
Correcting these mistakes doesn't require tools or technical expertise — just a little more attention to the details that manufacturers and HVAC technicians consistently flag as overlooked.
Know your baseline interval. A standard 1-inch fiberglass filter typically needs replacement every 30 days. A thicker pleated filter (3–4 inches) may last 60–90 days under normal conditions. These ranges assume one or two occupants, no pets, and average indoor air quality. Adjust shorter for heavy use seasons — peak summer cooling and winter heating — when the system runs longer daily cycles.
Match the filter to the system, not to marketing claims. A filter's MERV (Minimum Efficiency Reporting Value) rating indicates how fine a particle it captures. Residential systems typically perform best with MERV 8–11. Filters rated MERV 13 and above may capture more particles, but they also restrict airflow more aggressively. Before upgrading to a high-MERV filter, check your equipment manual or ask an HVAC technician whether your blower motor can handle the added resistance.
Inspect seasonally, not just by the calendar. During high-pollen spring months or dusty renovation periods, check the filter every two to three weeks regardless of your usual schedule. Visible gray or brown buildup means it's time to change — don't wait for a scheduled date. This kind of proactive maintenance connects directly to broader energy efficiency habits that reduce everyday costs.
Don't Ignore the Filter During Renovation or Remodeling
Construction dust — from drywall sanding, cutting, or demolition — is far denser than everyday household dust. Running your HVAC system during or immediately after renovation work without checking the filter frequently can clog it within days. In some cases, it's wise to turn the system off during dusty phases and cover return vents with temporary plastic sheeting. Replace the filter immediately once the work is done.
Write down the filter dimensions before you shop. Filter sizes are printed on the cardboard frame of the existing filter. Common dimensions like 16×20×1 or 20×25×1 look similar on the shelf but are not interchangeable. Installing a filter that's even half an inch too small leaves a gap that lets unfiltered air — and dust, pollen, and debris — flow straight into your system's interior components.
If you're unsure whether a DIY HVAC task is within scope, reviewing where DIY home work commonly goes wrong is a useful reference for knowing when to call a professional.

Author
Home & Garden Editorial Team
Home & Garden Editorial Team is the collective byline for our editorial team and contributor network. Articles published under this byline or an editorial pen name are researched, written, and reviewed according to our editorial standards for clarity, consistency, and independence before publication.
View all articles →