
Starting a Vegetable Garden From Scratch
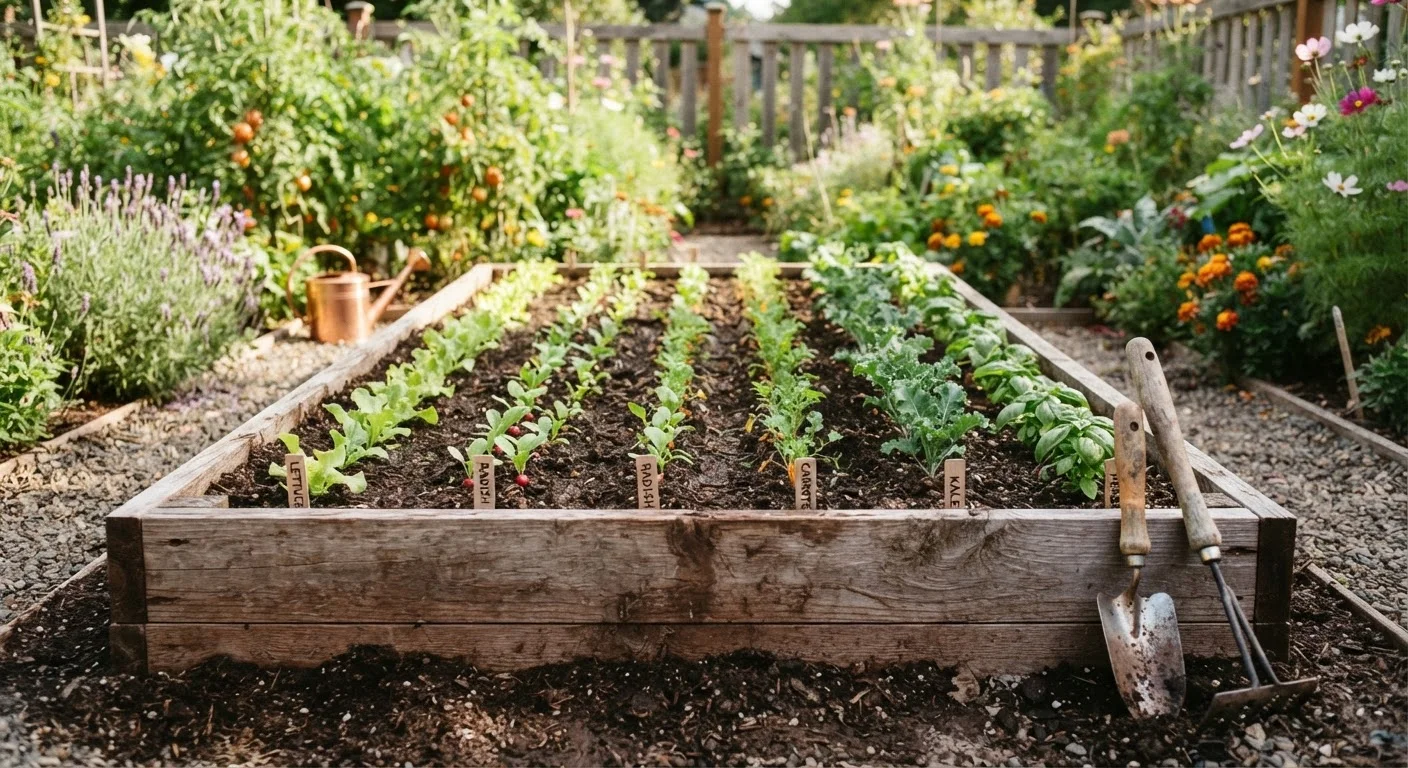
Photo credit: ExplorerGrid.com | Endless Grid Of Factual Content
In this article
A practical, end-to-end introduction to planning, planting, and maintaining your first vegetable garden—from site selection to harvest.
Key Takeaways
- Most vegetables need at least six hours of direct sunlight daily — site selection is your most critical first decision.
- Starting small (a 4×8 ft raised bed or a 4×4 ft in-ground plot) prevents overwhelm and builds confidence.
- Healthy soil is the foundation of a productive garden; improving it before planting pays dividends all season.
- Consistent watering and early pest monitoring matter more than any single fertilizer or product.
- Keeping notes on what worked and what didn't turns each season into useful data for the next.
Choosing the Right Site
Before you buy a single seed packet, spend time observing your yard. The most important factor for any vegetable garden is sunlight — most crops need six to eight hours of direct sun each day. Walk your yard in the morning, midday, and afternoon to see which areas receive consistent light and which fall into shade from trees, fences, or structures.
Beyond light, consider these factors:
- Proximity to water: You will water frequently, so locating your garden near an outdoor spigot saves real time and effort.
- Level ground: Flat or gently sloping sites drain better and are easier to work. Steep slopes cause runoff and uneven moisture.
- Distance from large trees: Mature trees compete aggressively for water and nutrients, and their roots can extend well beyond the drip line.
- Wind exposure: Strong, consistent wind dries soil quickly and can damage young plants. A natural or built windbreak on the prevailing side helps.
If a traditional in-ground bed isn't workable in your space, container gardening offers a practical alternative for patios and balconies.
Frost date
The average date in spring when the last below-freezing temperature typically occurs in your area. It determines when it is safe to plant tender crops outdoors.
Direct sowing
Planting seeds directly into the garden soil rather than starting them in containers indoors first.
Transplant
A young seedling that was started indoors or in a greenhouse and then moved to its outdoor growing location.
Soil amendment
Any material — such as compost, aged manure, or perlite — mixed into existing soil to improve its structure, drainage, or nutrient content.
Crop rotation
The practice of planting different vegetable families in different spots each year to reduce pest and disease buildup in the soil.
pH level
A measure of how acidic or alkaline your soil is, on a scale of 0–14. Most vegetables grow best in slightly acidic to neutral soil, roughly 6.0 to 7.0.
Planning Your Garden Layout
Good planning prevents the two most common beginner mistakes: planting too much and planting without considering plant spacing or height. Start by deciding what you actually want to eat — there's little point growing an abundance of something your household doesn't enjoy.
Start Smaller Than You Think
A 4×8 foot raised bed or a modest 4×4 foot in-ground plot is plenty for a first season. Larger plots quickly become overwhelming without established routines. Succeed with a small space first, then expand the following year with experience behind you.
Once you have a crop list, sketch your plot to scale on graph paper or a simple digital tool. Keep these layout principles in mind:
- Tall plants to the north: Position tall crops like staked tomatoes, corn, or pole beans on the north side of the bed so they don't shade shorter neighbors.
- Respect spacing guidelines: Seed packets and transplant labels list spacing for a reason. Crowded plants compete for nutrients and are more prone to disease.
- Group by water needs: Place thirsty crops together and drought-tolerant herbs separately to simplify irrigation. Our drought-tolerant landscaping guide covers water-wise principles that apply to kitchen gardens too.
Also check your region's last frost date before finalizing planting times. Your local cooperative extension service publishes this data free of charge and tailors it to your county.
Preparing and Improving Your Soil
Healthy soil is living infrastructure — it supplies nutrients, holds moisture, and supports beneficial organisms that protect plant roots. Before planting, invest time in understanding and improving what you have.
Don't Skip a Soil Test
Planting directly into untested soil is one of the most common first-year mistakes. Nutrient deficiencies and pH imbalances can silently limit yields even when everything else looks right. Many county cooperative extension offices offer low-cost soil testing kits — results typically include specific amendment recommendations for your garden.
For a new in-ground bed, begin by removing grass and weeds, then loosen the soil to a depth of 10 to 12 inches. Compacted subsoil limits root penetration and drainage. Add a 2- to 4-inch layer of compost and work it into the top 8 inches. Compost improves clay soil (helping it drain) and sandy soil (helping it retain moisture) — it's genuinely a universal fix.
Making your own compost is cost-effective and environmentally practical. Our guide to composting at home walks through exactly how to set up and maintain a productive compost system using kitchen and yard scraps.
For raised beds, fill with a blended mix — often topsoil, compost, and a draining amendment like coarse perlite or aged bark — rather than native soil alone. This gives you immediate control over texture and fertility.
Planting, Watering, and Ongoing Care
With site selected, layout planned, and soil improved, you're ready to plant. Timing matters: warm-season crops like tomatoes, peppers, cucumbers, and squash go in after your last frost date when soil has warmed to at least 60°F. Cool-season crops like lettuce, spinach, kale, broccoli, and peas can go in several weeks before the last frost — they actually prefer cooler temperatures.
Water consistently and thoughtfully:
- Aim for roughly one inch of water per week from rain and irrigation combined.
- Water at the base of plants rather than overhead to reduce fungal disease risk.
- Check soil moisture 2–3 inches below the surface before watering — surface appearance can be misleading.
- Drip irrigation or soaker hoses deliver water efficiently and reduce weed germination in the paths between plants.
Mulch — 2 to 3 inches of straw, shredded leaves, or untreated wood chips — laid around plants after planting significantly reduces moisture loss, suppresses weeds, and moderates soil temperature.
Scout your garden every few days for early signs of pest or disease pressure. Catching problems early — a cluster of aphids on a leaf underside, wilting that signals root rot — is far easier than managing an established outbreak.
Harvesting and Planning for Next Season
The most overlooked skill in vegetable gardening is harvesting at the right time. Most crops taste best — and produce longer — when picked at peak maturity rather than left to overripen on the plant. Zucchini left to grow into a club diminishes flavor and signals the plant to stop producing. Beans picked frequently encourage more flowers. Harvest regularly and your garden rewards you with more.
As the season winds down, use the fall garden prep checklist to close out properly — removing spent plants, amending beds for the following spring, and protecting soil structure through winter.
Keep a simple journal this season. Record what you planted, when, how it performed, and any pest or disease issues. This record becomes your most valuable planning tool for year two. Apply crop rotation — moving plant families to different spots each season — to reduce recurring pest and disease problems without chemical intervention.
Growing your own food is a skill that compounds: each season's knowledge builds on the last, and the garden you tend in year three will look dramatically different — and more productive — than the one you're starting today.
Frequently Asked Questions

Author
Home & Garden Editorial Team
Home & Garden Editorial Team is the collective byline for our editorial team and contributor network. Articles published under this byline or an editorial pen name are researched, written, and reviewed according to our editorial standards for clarity, consistency, and independence before publication.
View all articles →